Add Calculations Components to a Form
This guide explains how to enable and configure Calculations Components in a form within a project template. Adding Calculations Components to a form lets you calculate values based on form inputs or other project/global variables.
For example, if a project has a strict limit on permitted costs per unit or overall expenses, you can set up a Calculations Component that reviews the relevant form responses and flags those that exceed the budget.
For Calculations Components to appear in the Form Builder stage settings, the feature must be enabled at the organizational level.
When to Add a Calculations Component
You should add a Calculations Component when you need to:
- Calculate totals or subtotals based on user input.
- Validate data against budget thresholds or financial limits.
- Provide additional cost breakdowns (e.g., tax, fees, or per-unit cost).
To Enable and Add a Calculations Component
- Go to the Workflow tab of your Project Template.
- Click Add Stage to Workflow.
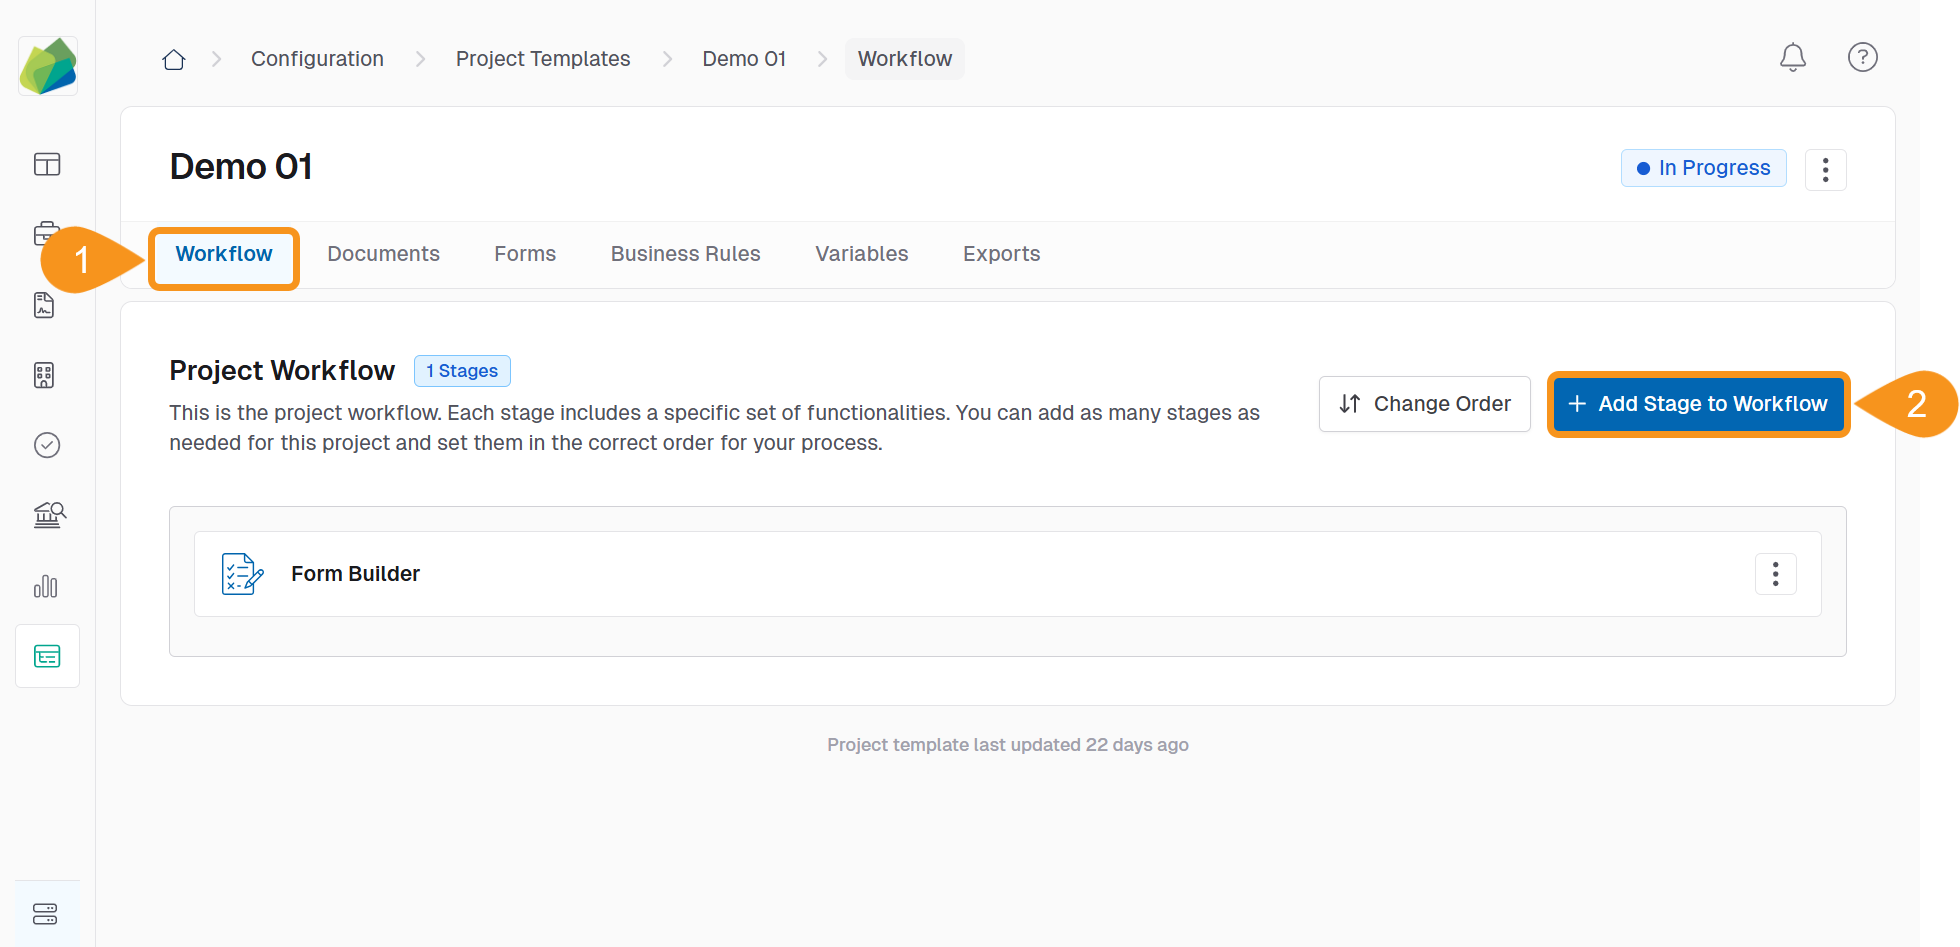
- Select Form Builder.

- In the stage settings panel, check Enable Calculations Component.
- Click Save Stage.
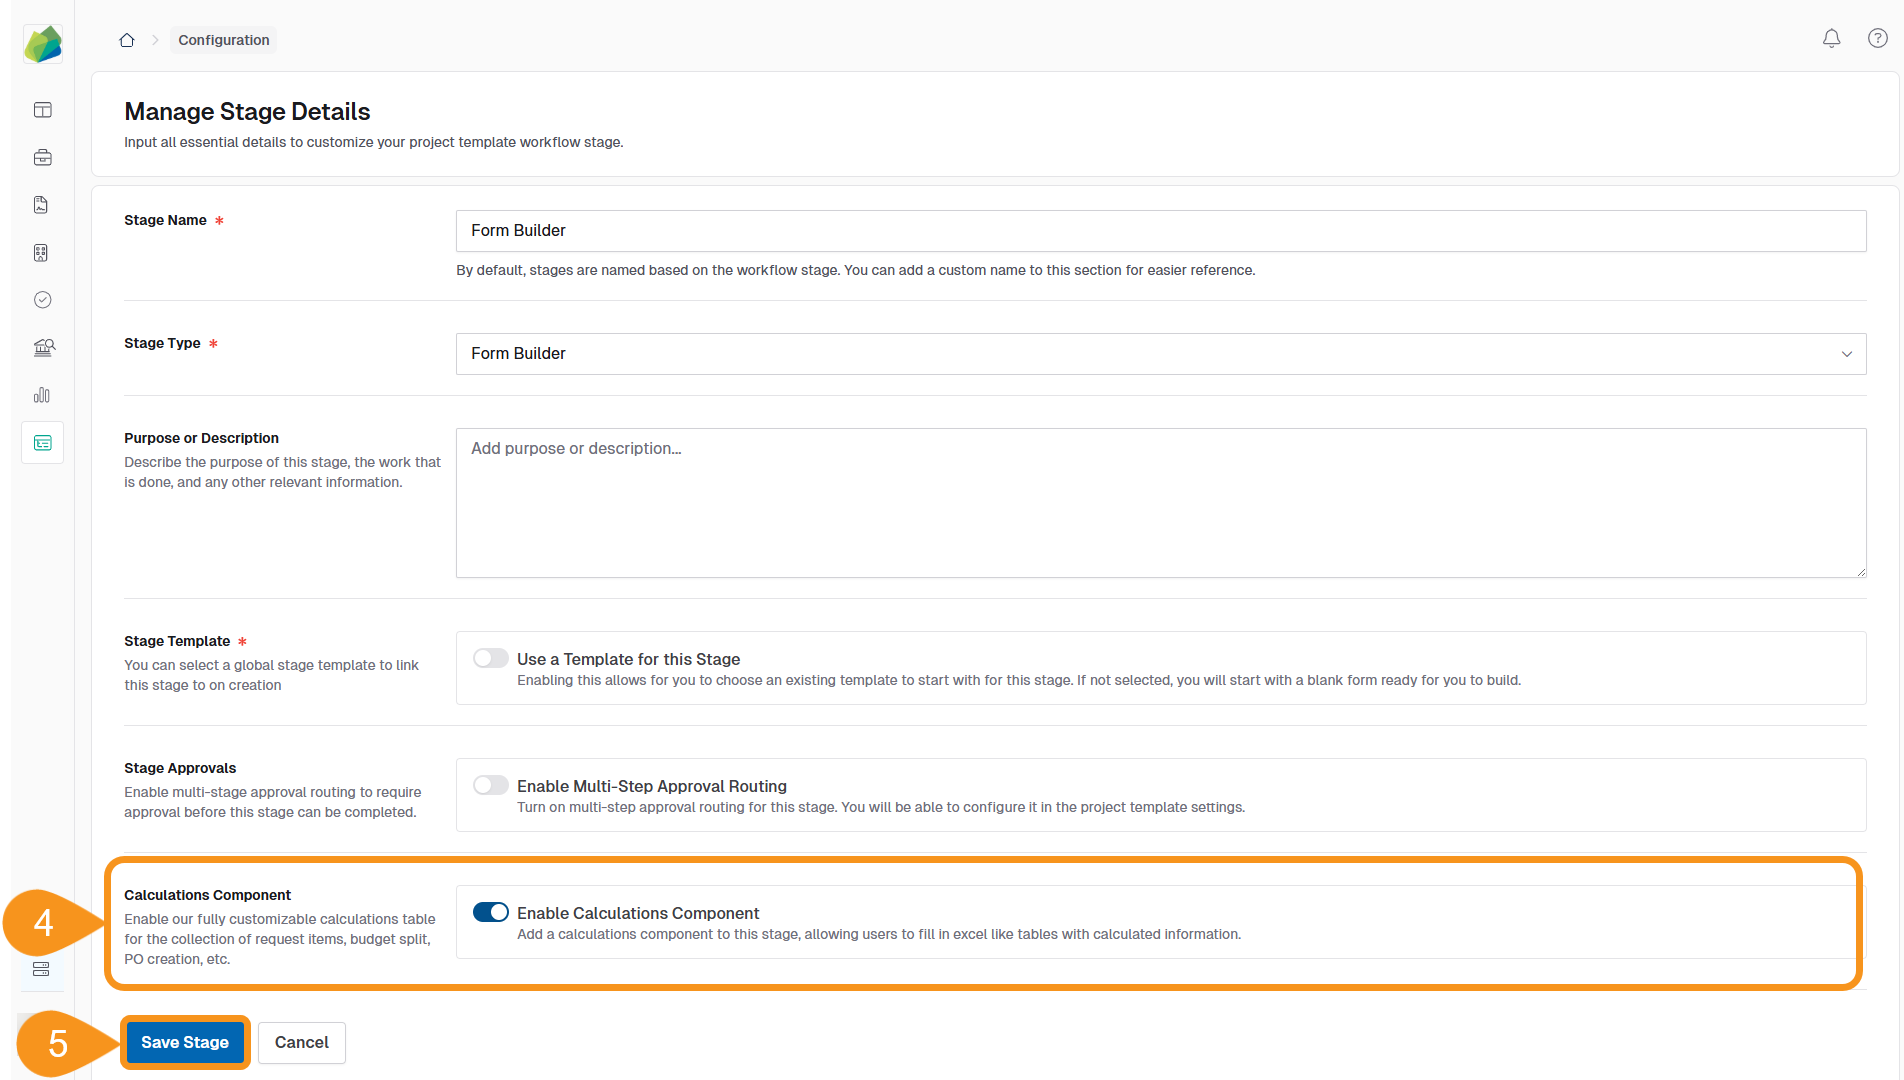
Once enabled, a Calculations Component table will appear in the Form Builder.
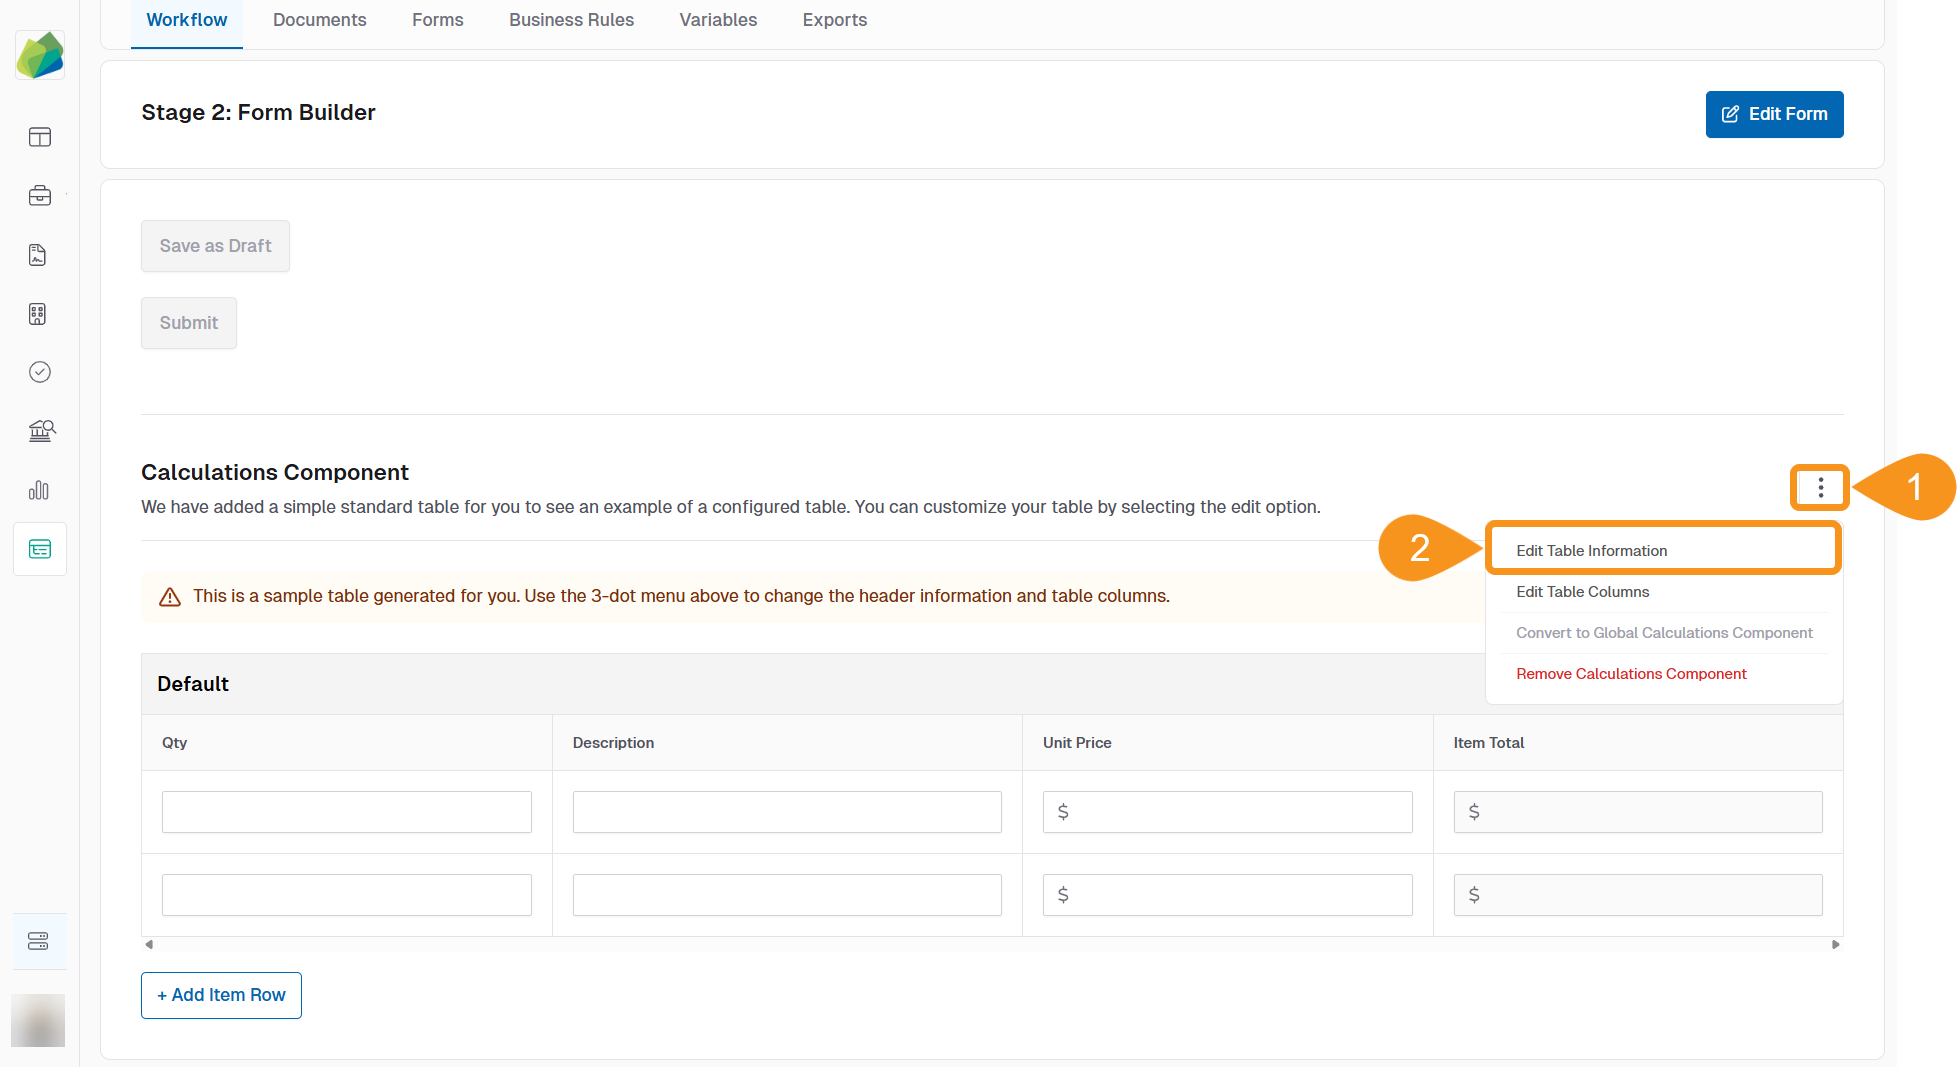
To Configure the Calculations Component
- Click the kebab menu (︙) next to the component.
- Select Edit Table Information.
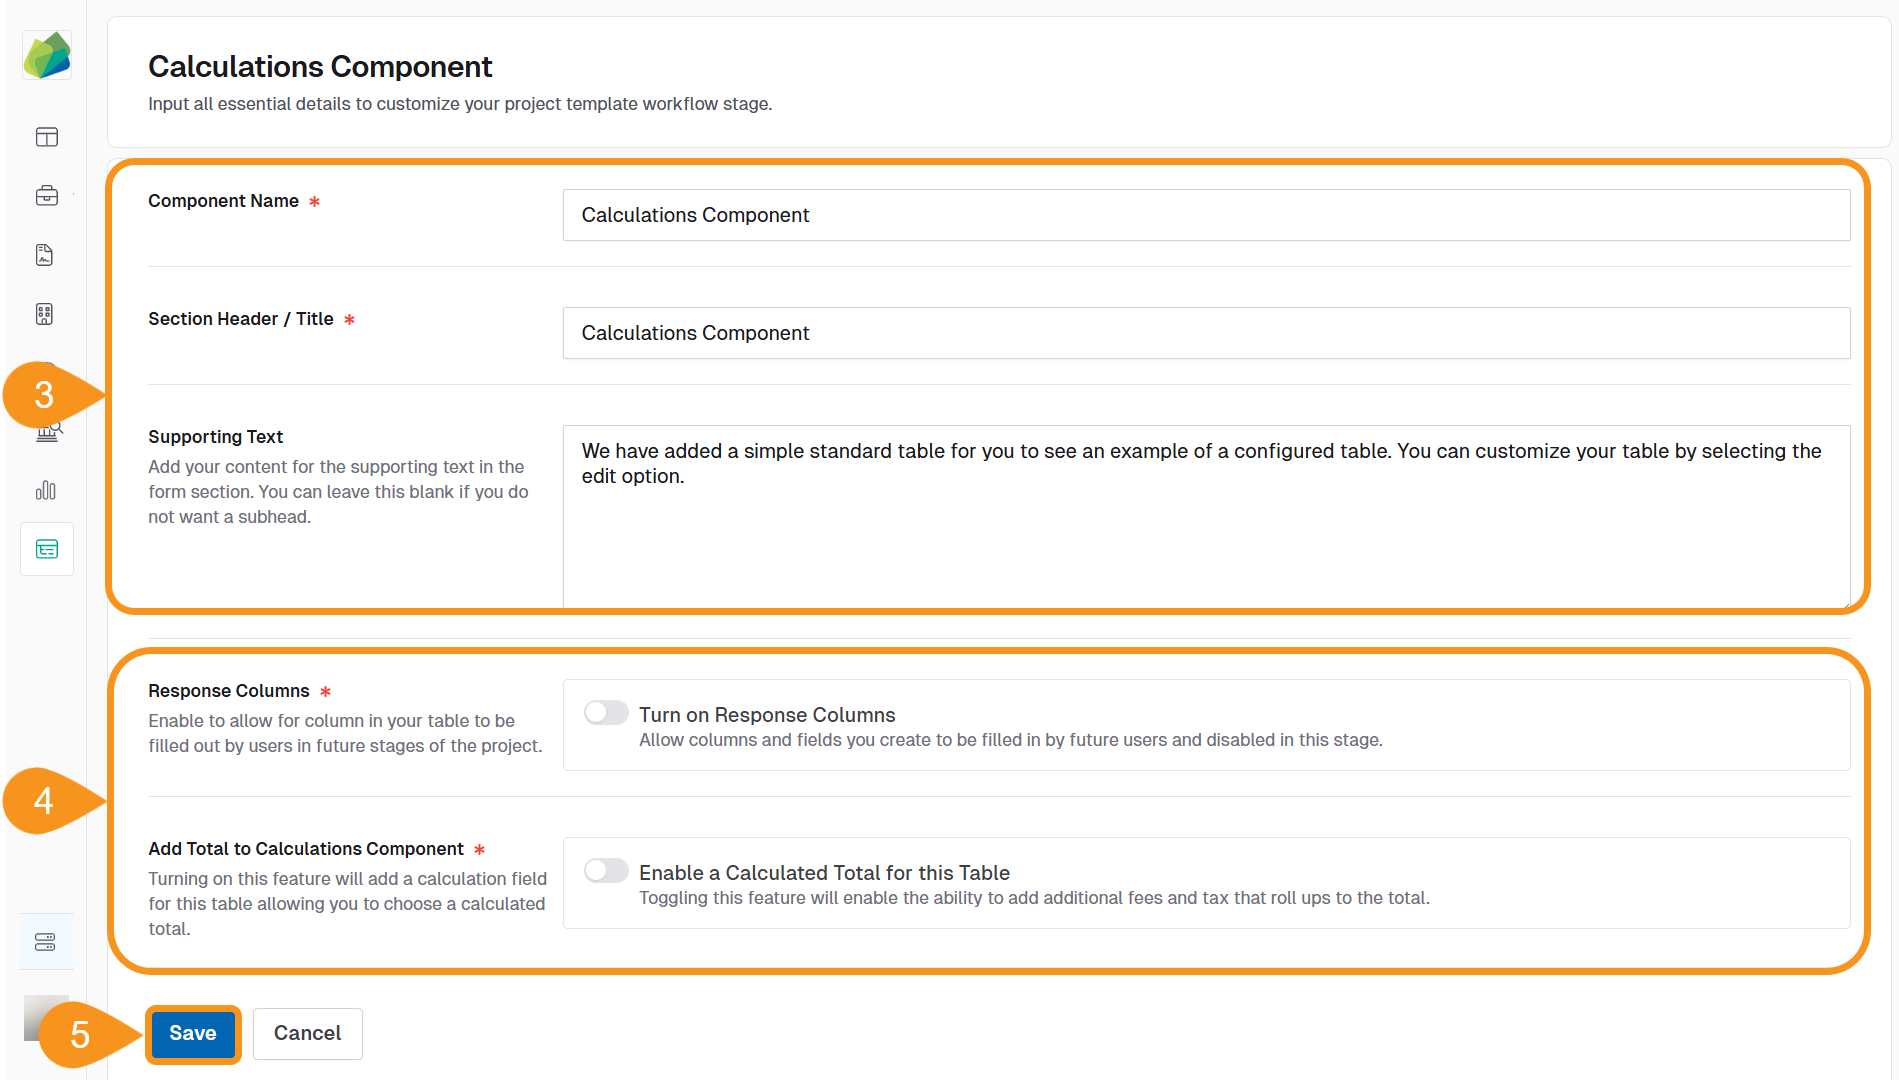
- Enter the component details:
- Component Name: Give your table a clear name (e.g., “Cost Summary”).
- Section Header/Title: This appears above the table in the form—use it to identify the section.
- Supporting Text (optional): Add a short message to help guide users as they fill out the table. Leave blank if not needed.
- Enable one or both of the following features:
- Turn on Response Columns: Allows users in later stages of the project to enter data into the table. Fields will be read-only during this setup stage.
- Enable a Calculated Total for this Table: Adds a calculation field to the table. You’ll be able to configure additional fees and taxes that are included in the total.
- Click Save to confirm your settings and open the Component Preview.
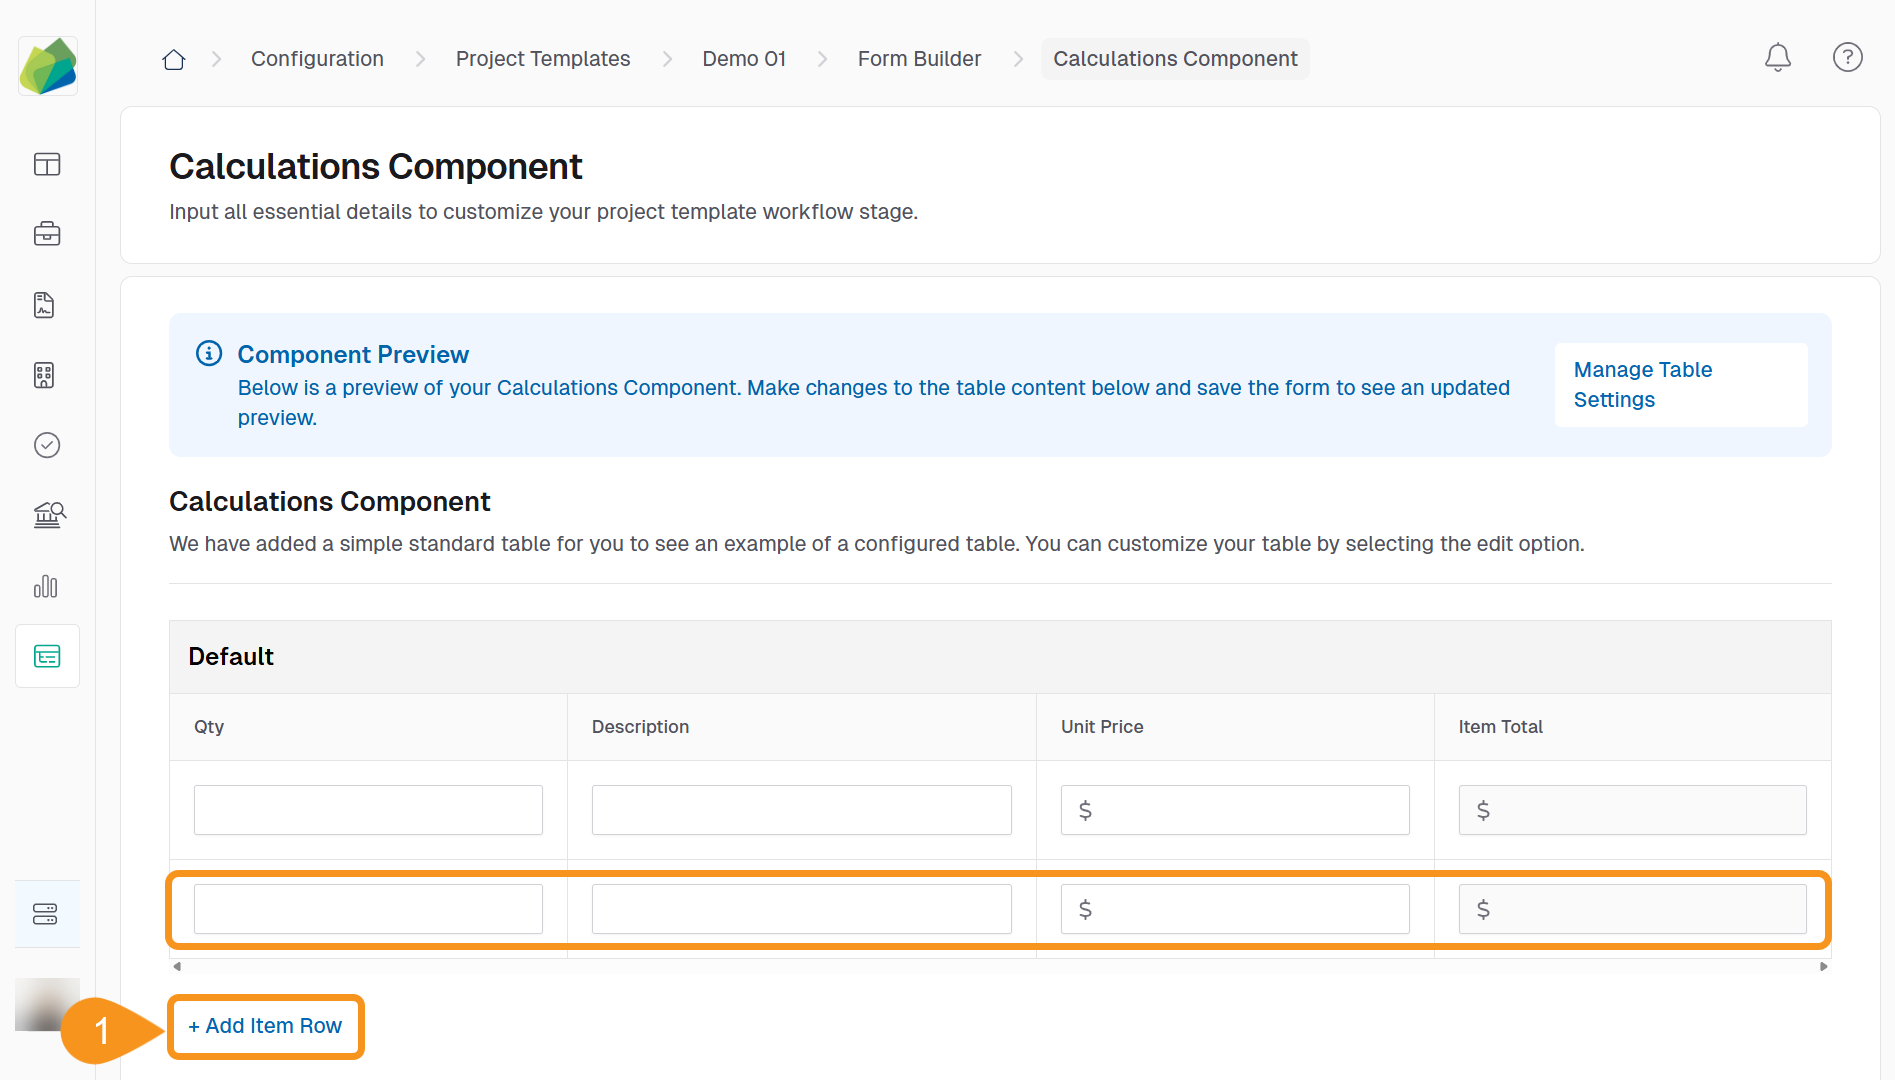
To Add Item Rows
You can add sample rows to preview how users will input data.
- In the Component Preview section, click + Add Item Row.
New blank rows will appear in the preview table for configuration/testing purposes.
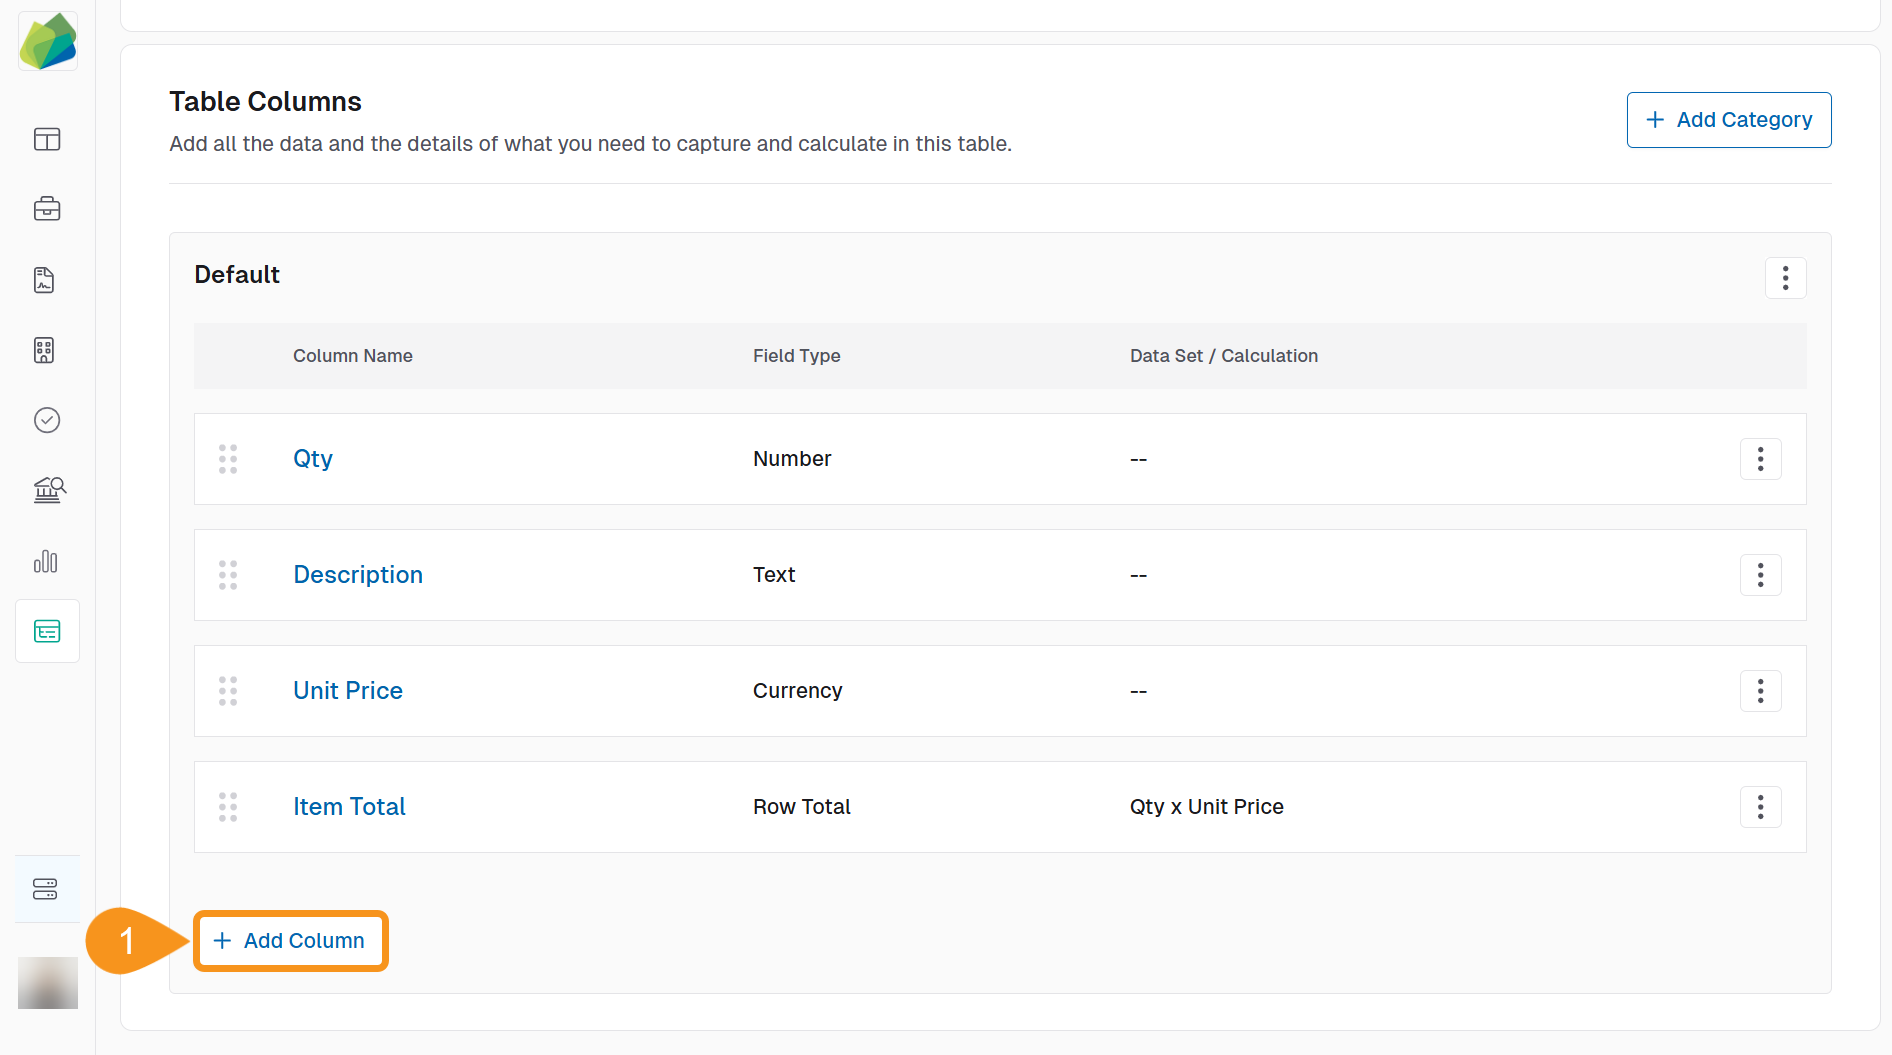
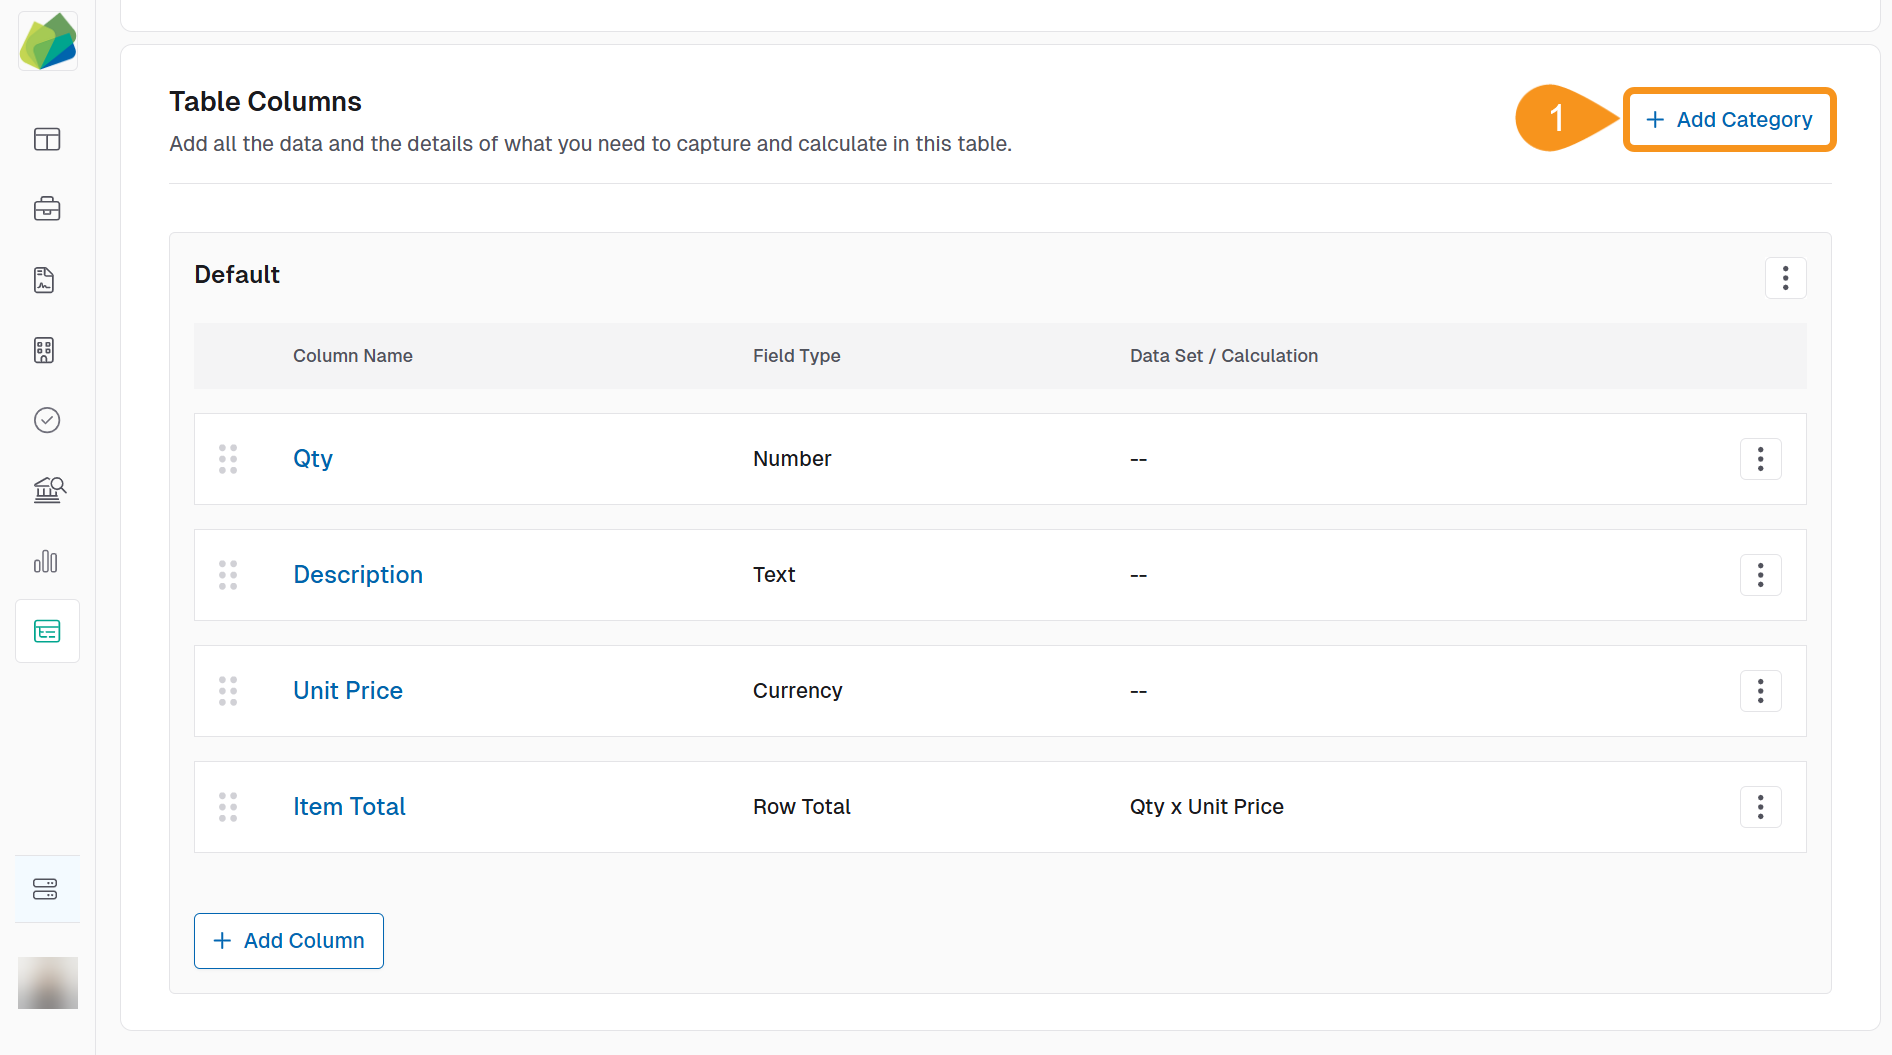
To Add and Configure Table Columns
Columns define the fields that appear in your table. You can create and configure them individually.
- In the Table Columns section, click + Add Column.
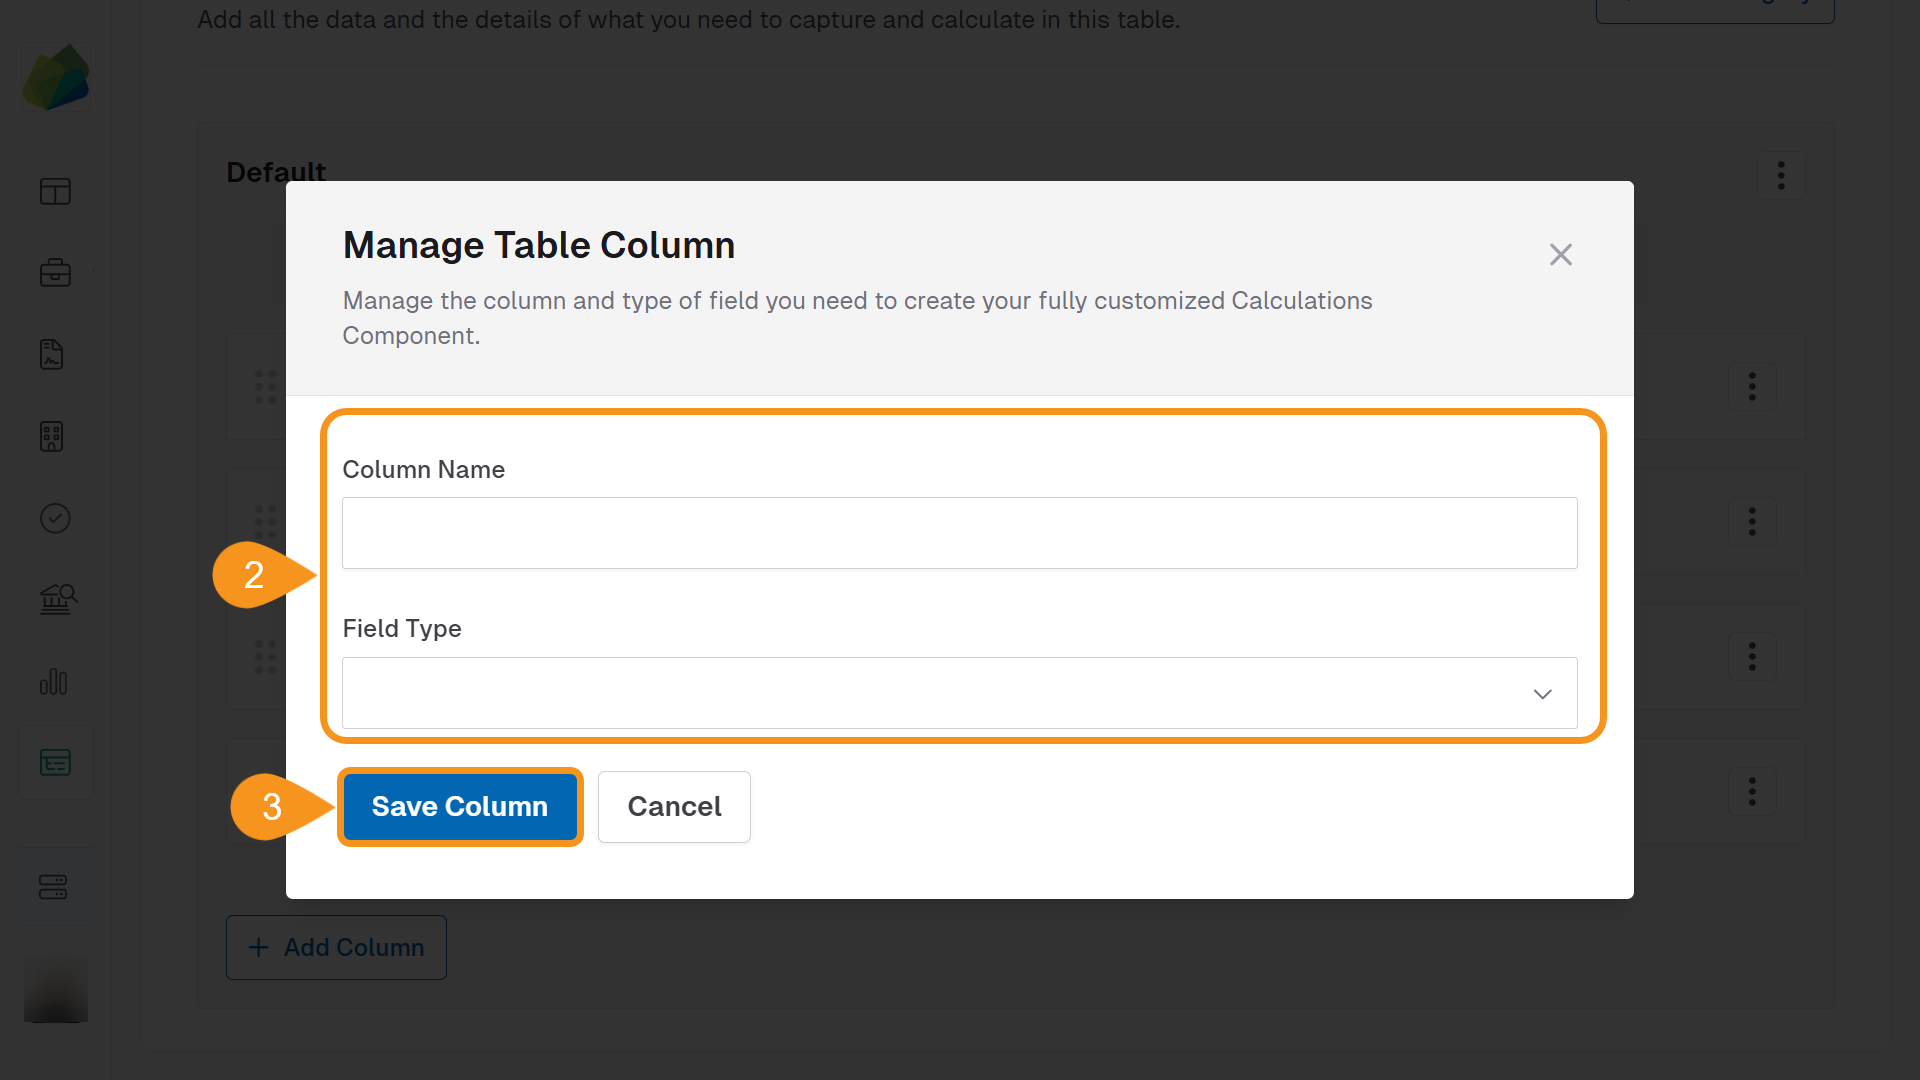
- In the Manage Table Column popup, fill in the following:
- Column Name: Give your column a descriptive title.
- Field Type: Choose the appropriate type (e.g., Number, Text, Currency, Date, Calculated).
- Click Save Column to add the column to the table.
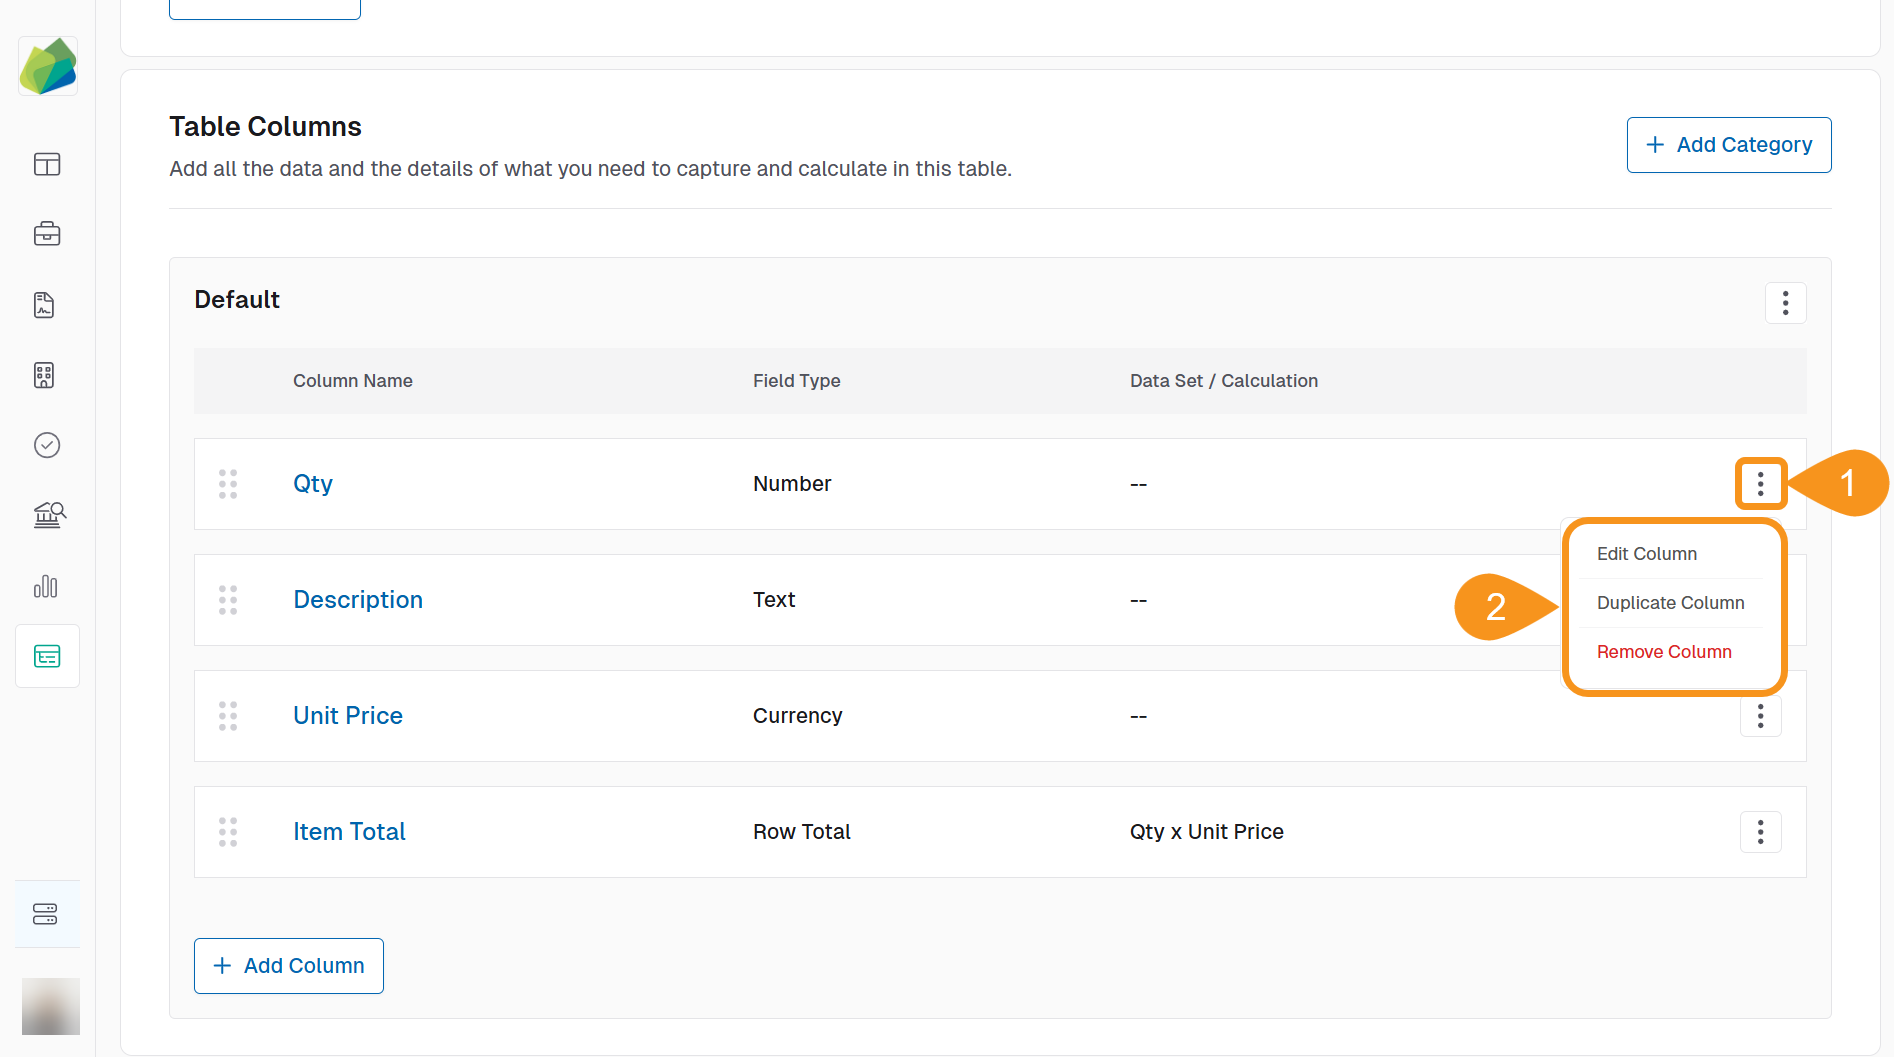
To Manage Table Columns
- Click the kebab menu (︙) next to the column you want to modify.
- Choose one of the following options:
- Edit Column to update the column name, field type, or other settings.
- Duplicate Column to create a copy of the column.
- Remove Column to delete it from the table.
If the component is configured to support it, you may also be able to:
- Mark a column as a Responder Field
- Define Row Total Calculations
- Add Additional Costs & Fees
Once you're done, use the top navigation to return to the Form Builder stage.
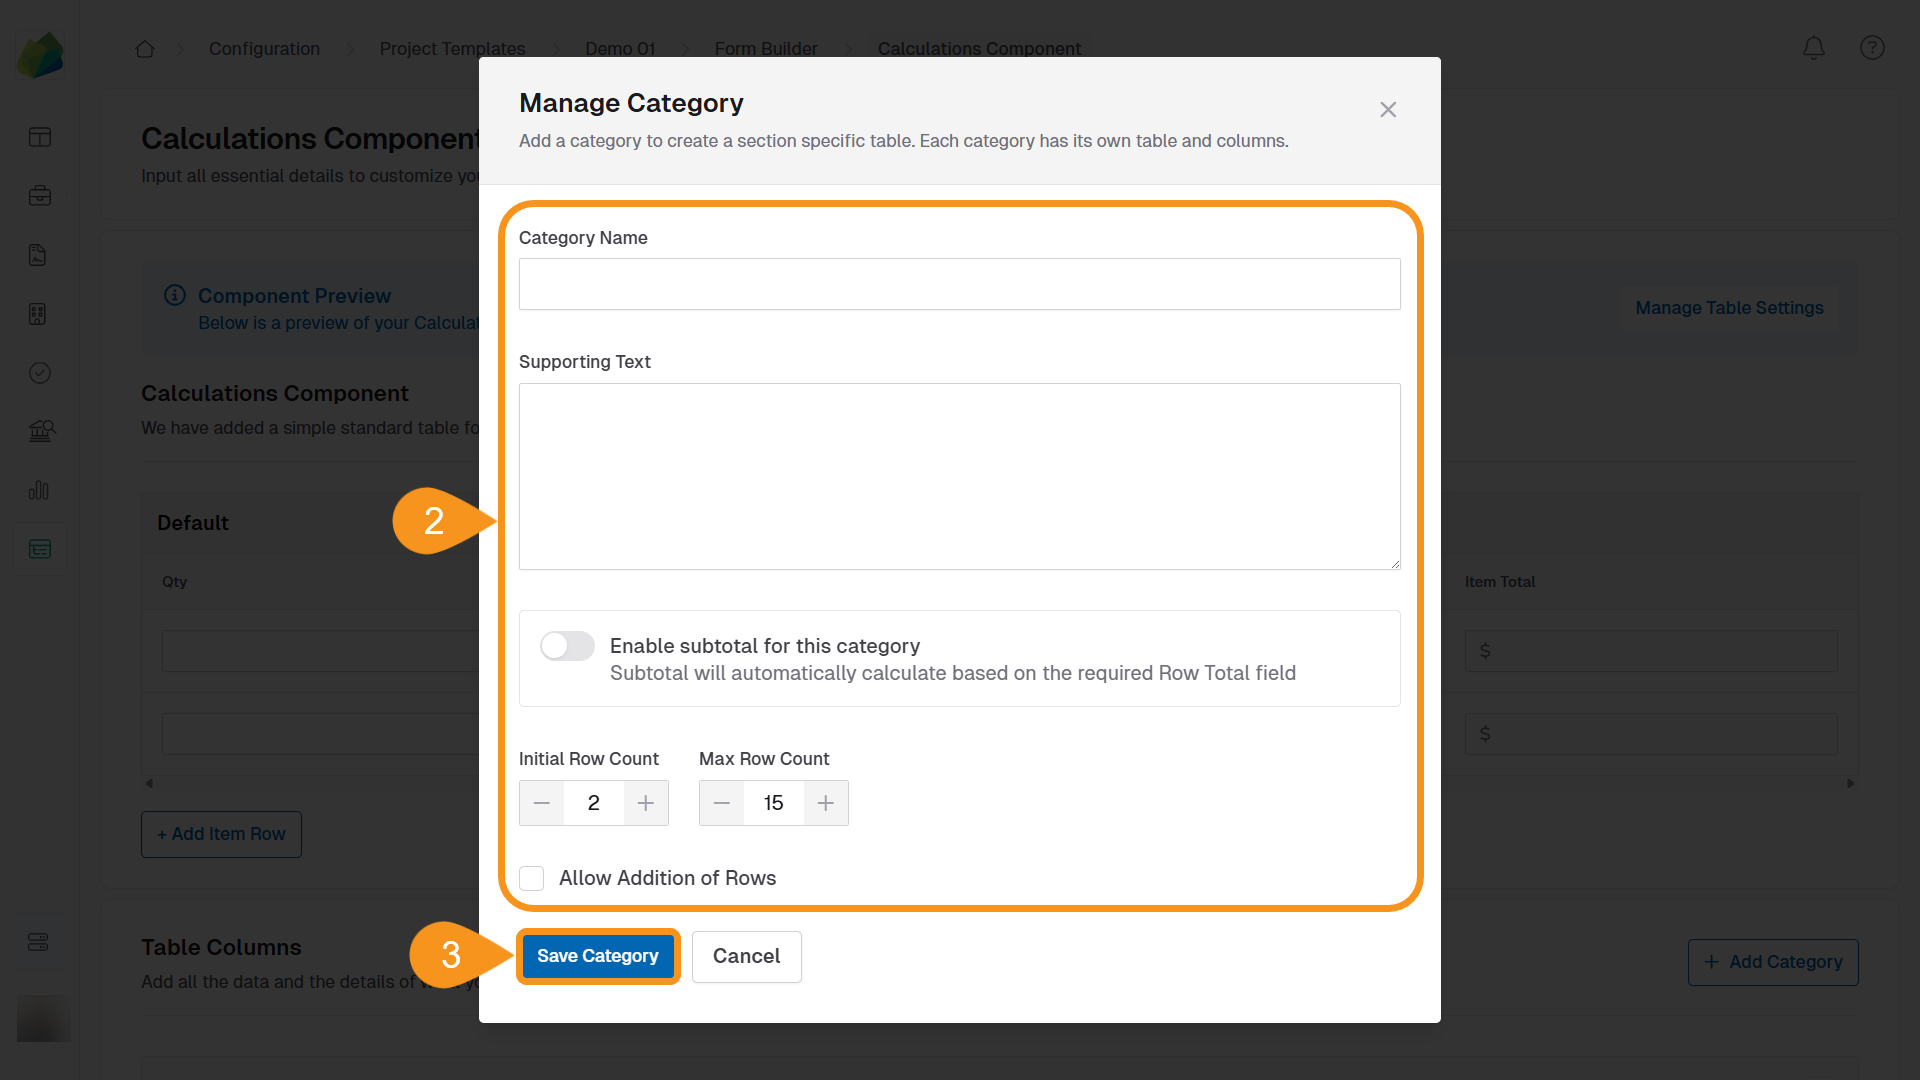
To Add Categories
Categories help you organize related columns into separate sections within the table.
-
In the Table Columns section, click + Add Category.
-
In the Manage Category pop-up, complete the following fields:
- Category Name: Enter the name for the category.
- Supporting Text (Optional): Add any descriptive text to guide users.
- Enable subtotal for this category: Toggle this on if you want to automatically calculate a subtotal based on the Row Total field.
- Initial Row Count: Set how many rows should appear by default.
- Max Row Count: Set the maximum number of rows allowed in this category.
- Allow Addition of Rows: Check this if users should be able to add more rows beyond the initial count.
-
Click Save Category to apply your changes.
See Also
To complement your knowledge of this process, check the following pages: