Advance Projects Between Stages
This guide explains how to advance a project through its workflow stages, from initiation to completion. Workflow stages guide the project lifecycle, helping teams move smoothly from one stage to the next and complete milestones on time. Advancing projects correctly helps maintain steady progress and keeps the project on track.
When to Advance a Project Stage
You should advance a project stage when:
- All tasks and deliverables within the current stage are finalized.
- The project is ready to move to the next phase of its lifecycle.
- The project owner has confirmed the completion of all requirements for the current stage.
To Advance a Project to the Next Workflow Stage
- From the Dashboard, go to the Projects drop-down from the sidebar.
- Select the Project Type corresponding to your project.
- Find your project and select View Project. This will take you to the currently active workflow stage.
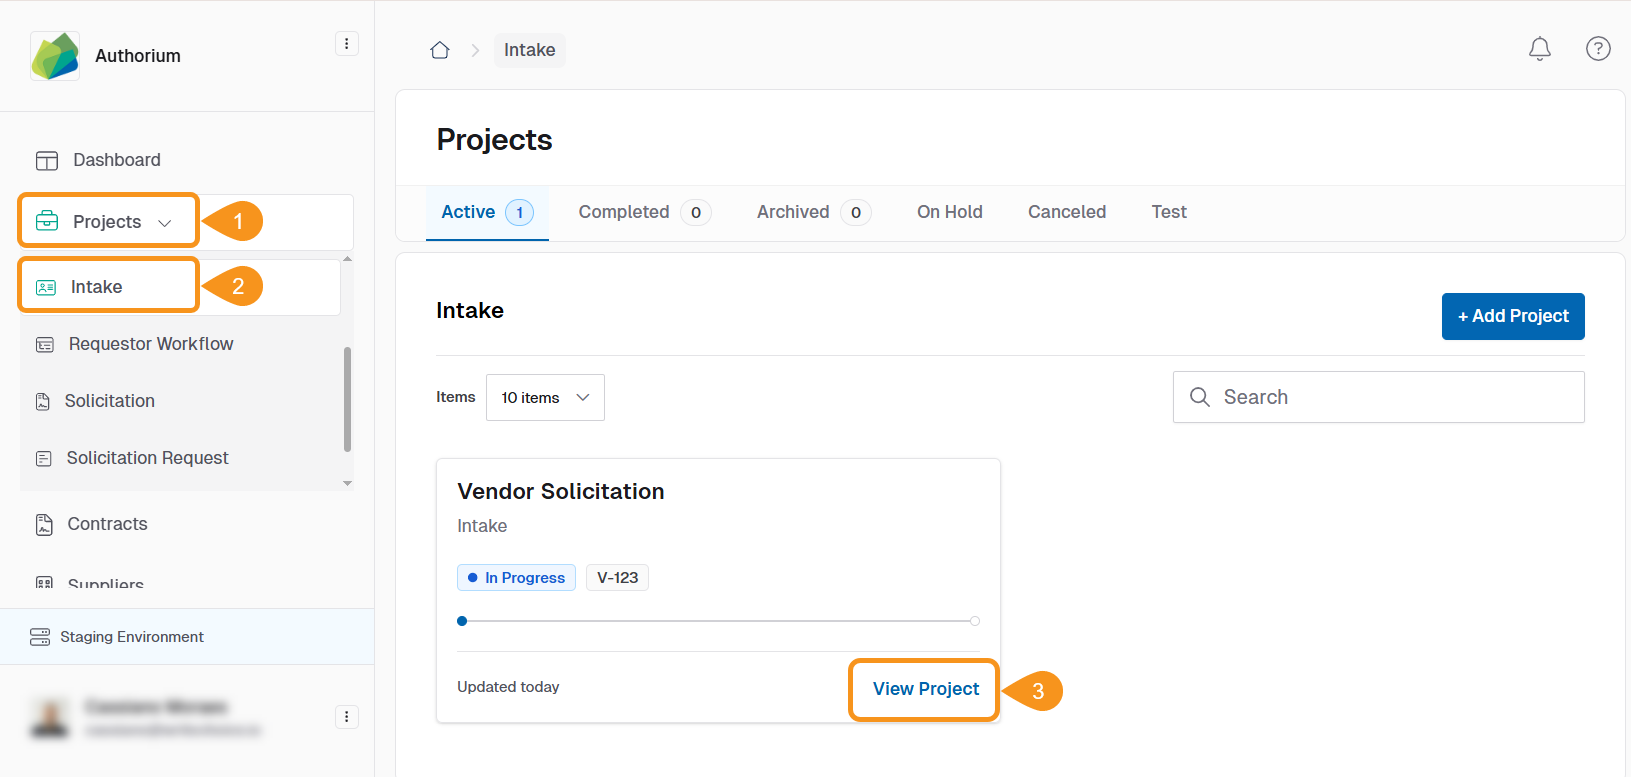
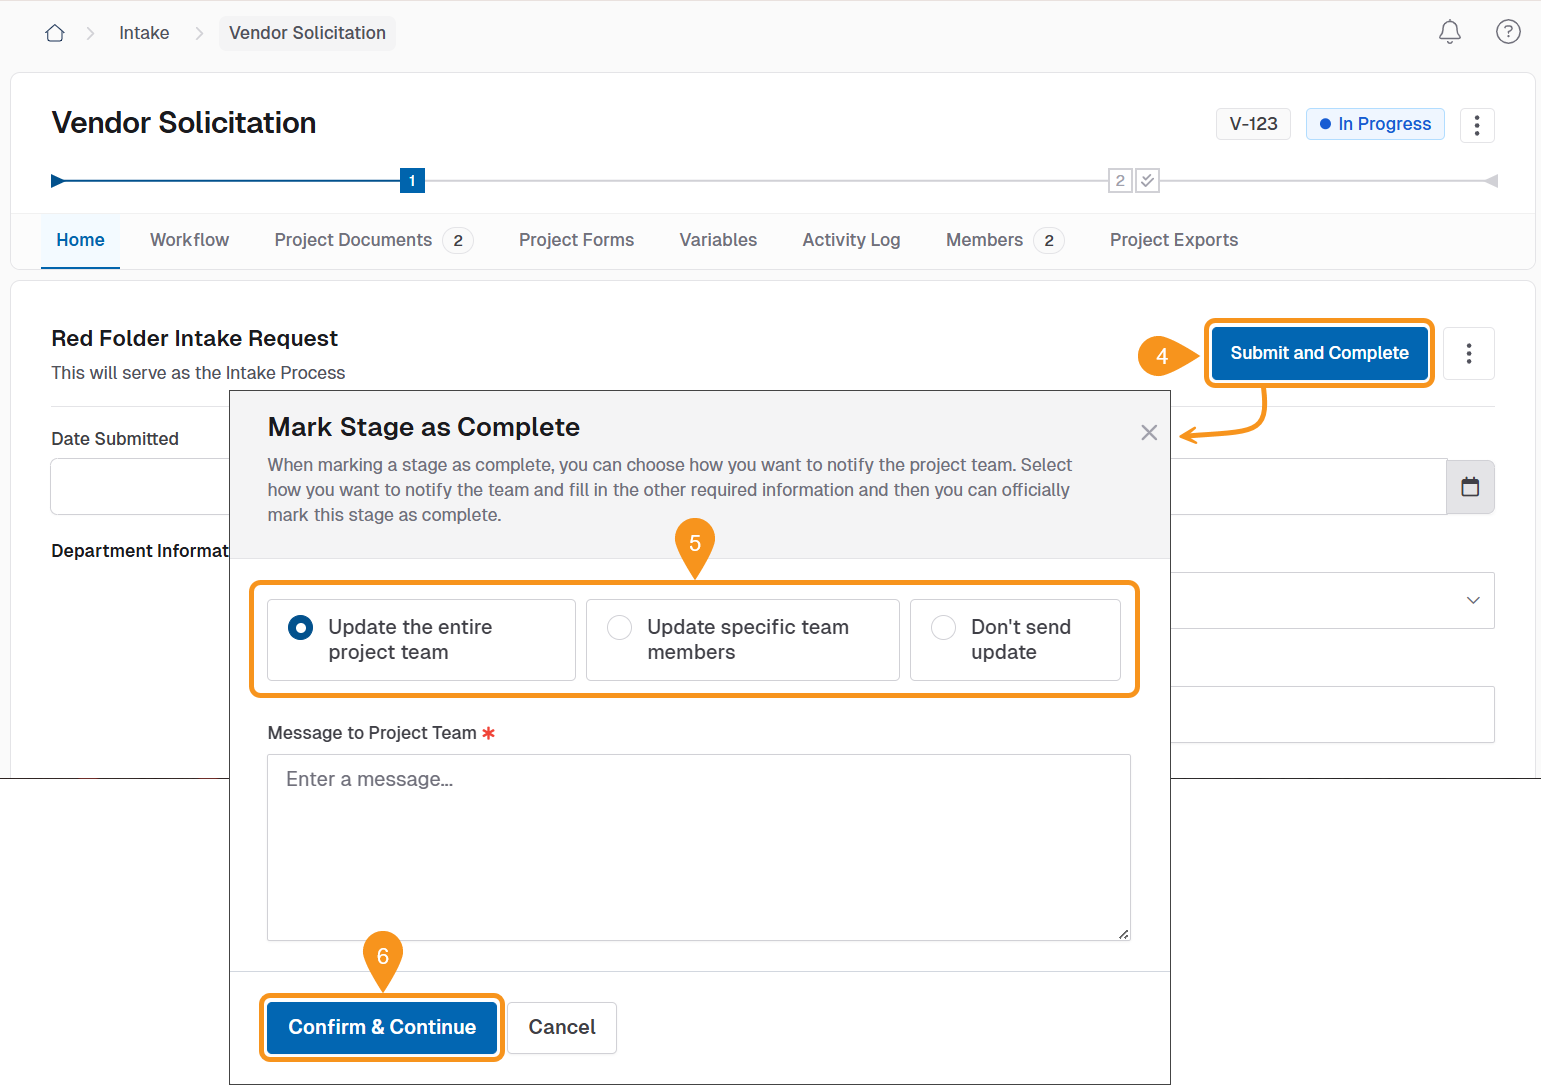
- Select the Submit and Complete option to mark the stage as complete.
Stage Documents
If you are dealing with a Documents Stage, the option you will see is Mark Stage as Complete.
- In the modal window that opens, select one of the following options:
- Update the entire project team: Notifies all members involved in the project about the stage completion.
- Update specific team members: Sends a notification only to selected team members.
- Don't send update: Marks the stage as complete without sending any notifications.
- Click Confirm & Continue to save your changes. The stage will be marked as complete and you will ve automatically moved to the next one.
Notes
- To mark a workflow stage as complete, all documents pertaining to that stage must be finalized.
- If you are unable to mark a workflow stage as complete, double-check that all associated documents have been completed.
- For Online Submissions stages, the project must have received at least one submission before the stage can be marked complete.
See Also
To complement your knowledge of this process, check the following pages: